With the touch of a button (more or less) you can now share the entire world around you. Not just what’s in front of the camera, but what’s behind, above and to a lesser extent even below it. Unlike anything that’s ever been available before giving you a full 360° perspective. What makes this even better is the ability to use a VR headset. This brings your shots to life, truly immersing yourself as if you’re actually stood there while the pictures were taken.
After some trial and error myself I thought I would jot down a few hints and tips to help you along the way.
Tripods are great for traditional photography, but they do not work well for 360° for a simple reason: most of them have large bases, designed to hold a heavy DSLR camera. If you attach a Ricoh or a Gear 360 to that, the base will be visible in the photo and it will be huge. This is a problem similar to the giant thumb issue.
What’s even worse, a lot of tripods have a handle under the base used to adjust the position and rotation of the camera. Those handles of course are visible in a 360° photo and they look just terrible, so avoid tripods that have them! If you want the extra height and stability of a tripod then I recommend to look at light stands. You can find accessories here.
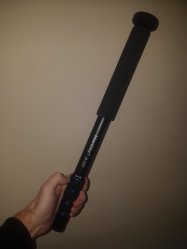
 Most 360 cameras work with standard tripod mounts, so don’t limit yourself to any stands that come with your camera. Even using a selfie stick to hold the camera in the air is better than holding it with your hand. Preferably get yourself a monopod without any over hanging screws near the top and has a narrow base. If you find when pulled out it’s a little top heavy, then just slide some weights over the top. See my hands on review on my favourite low budget monopod here.
- Tip: Turn it upside down and have the narrow end at the top and lose the big round plate.
- Tip: Use a weight to help stop the monopod from falling, especially for outdoor use. You can use a dumbbell or ankle weight.
You can find accessories here.
Often manufacturers add their own logo to your footage as default, turn this off It leaves a small round logo at the bottom of all your Videos or photos and is usually massive as standard. You can add this if and when you want later. I always add my own in post processing, this way I have the original untouched clean shot to show off in panoramic or tiny planet mode. If you do forget to turn this off then the original saved unstitched file will usually remain untouched on your memory card, so if you do forget to turn it off don’t worry. Just reload the original and re-stitch at anytime.
This will be the key focal point of your image in a panorama or the start point in 360° viewing modes, if you get the orientation right to begin with then it makes life a little easier in post process. There are now some programs that allow you to re centre your photos and videos if you got it wrong, you can find them here.
Certainly in the early days of 360 cameras it was needed to always be in an upright position. Not tilted backwards, forwards or to the sides as it affected the VR controls. You can imagine i’m sure that this was easier said than done, especially when shooting handheld photos!
The good news is that most of the manufacturer’s now have auto tilt functions and try to fix this for you. However sometimes it doesn’t always work, but now there are apps that can help you fix these issues in post production, you can find them here.
Make sure you extend the selfie stick as far out as you can. Remember it sees all around you, so if you don’t extend your selfie stick fully then the shot will be right next to your face and when viewing that in VR, it’s highly likely you could be seeing right up your nose! Also and probably the most important with selfie sticks. DO NOT use any ball head or joint to move the angle of the camera on the stick, as this will then show the selfie stick in your shot. Keep the camera and the stick aligned always directly underneath, this will make sure the stick is hidden from view in the stitch line and will look like its a floating camera.
Objects that are close to the camera might get cut or distorted in stitching. Anything closer than one foot from the camera is at risk of being distorted. If you want to do a close up on an object and this object is relatively small, just make sure to place it in front of one of the lenses and not between them. For the same reason, it’s best to avoid putting the camera directly on a table or on the ground. Always try to use a small tripod or a stand. If the ground is far enough from the lens, there should be no visible stitching errors.
This can be useful for some situations, especially when using the camera as a standalone. You’ll want that extra time if you’ve set up on a monopod or extending a selfie stick giving yourself that time to get in position or hide out of the way. Remember if your not worried about using up the battery of your phone, use the app to control the camera from afar. You’ll get more precise results this way using the live view.
This is a feature that I think is often overlooked. You can film a 4k 360° time lapse which looks great in the right environment. Just set up your camera, stick it on a tripod and let it film for at least a few minutes. It will shoot still pictures at the rate you have selected and stitch them together to create a fast moving video.
For some reason the default settings on some cameras seem to reset at only 2k, so before shooting any video get and change this to the cameras maximum. On some cameras like the gear 360 this is probably easier to do on the camera itself, but most you will have to connect to the app.
360° photos and especially 360° videos are large files, ideally you’ll want to upgrade to at least a 64GB card or larger if you can and make sure the write speed is class 10 and UHS speed class 3 (U3) rating. This helps not only with how quick the camera saves files, but also with overheating as the camera doesn’t need to work as hard on transfer. I have been using a SanDisk Ultra 128GB microSD
If you’re only taking stills on occasion the battery can last for a couple days, but video drains the battery fast. Having a spare battery or a power pack at hand will help you to carry on with your day knowing you’ll never run out of power. You can find spare batteries & accessories here.
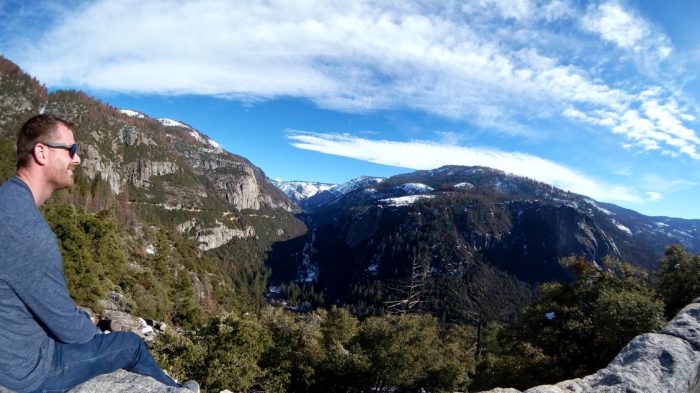
Some 360 cameras can use the lenses independently, which can be useful when all you really need is that one angle. I really didn’t need the 360° shot here that would have included the road behind me. If your camera doesn’t let you use one lense at a time then you can simply reframe your shot, more on that next.
Photo taken at Yosemite National Park
Manufacturers are now offering the possibility in post for reframing your already captured footage. Currently there are different incarnations of this feature like key frames, freecapture & overcapture. All of which are a great way to create eye catching footage and make sure the entertaining point is always in the frame where you want it to be.
 If you’re not careful especially when shooting in the sun you’ll get an obvious stitch line with the difference in colours. This occurs when one of the lenses are exposed to more light than the other. This is especially susceptible while shooting outdoors and one of the camera lenses is facing directly toward the sun, while the other is facing into a darker area. One image would appear much brighter than the other and this would make the stitch line very obvious.
Avoid this by making sure each lens is receiving roughly the same amount of light. Simply turn the camera sideways so that each lens is being hit with the same intensity of light.
You can usually adjust the ISO sensitivity in the settings menu of the cameras app. Usually the lower number is less sensitive to light and will have a finer grain (great for dark situations or night stuff). Higher ISO situations are for fast moving objects. However the higher the ISO you choose the noisier, grainier shots your likely to get.
You go to all the trouble of taking amazing pictures then you have to share them, check out my list of where you can share here.
Most camera manufacturers supply desktop software so you can edit your footage on PC or Mac. What’s also great is that some of these can be used with any 360º footage taken with any camera. Find out the best software available here.
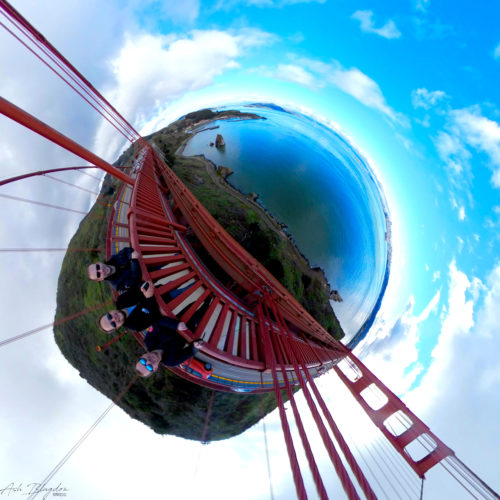
Create awesome tiny planet pictures or videos, you can simply view a photo choosing Tiny Planet, Little Planet, Round View and simply screenshot to save it, but I find this loses resolution and looks awful when trying to zoom in. I prefer to use a 3rd party app. To get the video you’ll also have to use another app and for more on that check here.
Typically its best to imagine the camera as another person, keep it around chin or eye level in height and at a similar distance away you would be when talking to someone. If you don’t want to be in the shot whether using a tripod or holding above your head find a place with the simplest and flattest surface you can. Think about removing it in post, placing on grass, concrete or wood are usually easy to mask out. Detailed carpets or patterned stones on the other hand are a pain in the arse.
One of the best features of 360° photos is how much context a single picture can capture. You can literally have a selfie, foodpic, landmark and all of your friends around you in a single shot! You can then reframe and pic out certain areas to create a standard 16:9. Instead of snapping hundreds of regular photos, just take a 360 and you’ve got it all in one. This way you have extra time to relax and enjoy whatever you are doing!
Lastly just get out there, have fun and be creative.
Shooting with 360 can be odd looking to some. I’ve found using it in public people do wonder what you are doing. I’ve had a few people ask me what that random weird thing is, I’m always happy to have a chat & explain. So if you find people staring at you in confusion, just give a friendly smile and acknowledgement.
If you found this helpful, please like and follow my social pages


