Everything you need to know about the Xiaomi Mi Sphere or Madventure 360. I’ve had the Mi Sphere since mid December 2017, so I thought I would write a review of my experience so far and of course include some tips I’ve picked up.
Update: 22 Feb 2021
- Do not use the latest version 1.20 desktop software, It’s only producing black video. Roll back to version 1.18, that works. Download it here.
When I first heard about the Xiaomi Mijia Mi Sphere I couldn’t even pronounce it. I thought it was another Chinese clone that would probably break after 2 minutes. I am very happy to say my assumptions were very, very wrong indeed. The Xiaomi Mi Sphere has turned out to be one of the best 360 cameras around and certainly the best I’ve used so far and no doubt the best value 360 camera available right now.
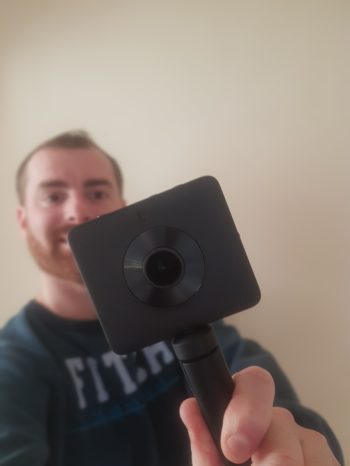
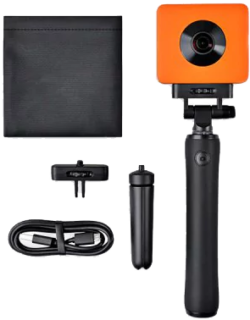
The Mi Sphere comes in its box with a mini tripod, a protective case and a USB cable. Nothing of any surprise there, these come as standard for most 360 cameras.
– The camera
– a mini tripod / handle
– a Micro USB cable
– a water resistant pouch
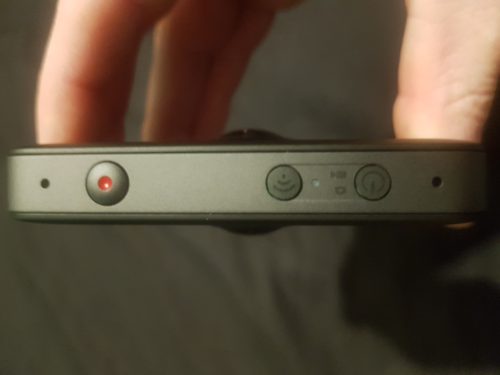
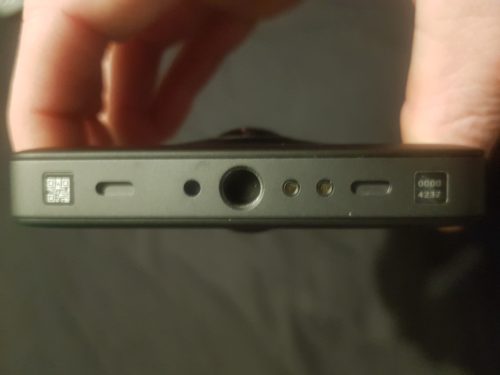
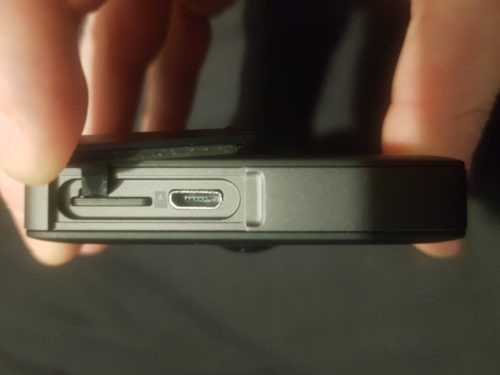
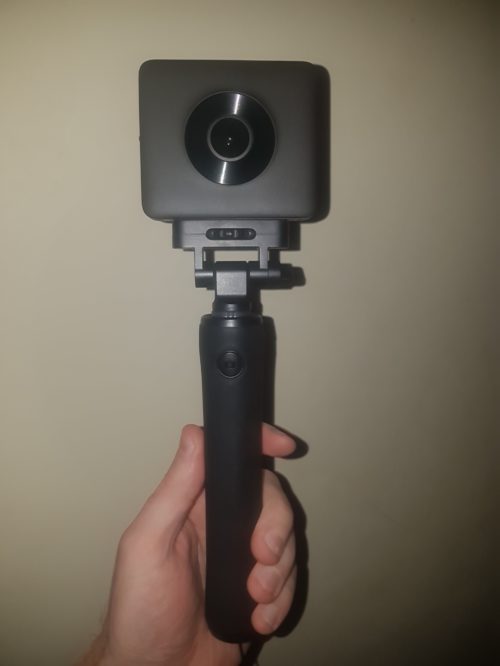
The Mi Sphere is a unique design as 360 cameras usually go. It’s almost a perfect square and very thin with the two lenses on either side. This should help it have very good stitching. There are three manual buttons on the top of the camera, which control power, Wifi and the shutter. There is no lcd screen, so all settings and image preview are handled using the official phone app. On one side of the Mi Sphere you’ll find the USB charging port and its here where you’ll also find the Micro SD card slot.
Its a sleek matte black finish with hidden LED. When you turn on the camera two LED’s flash and one will stay lit depending on whether the camera is in photo mode or video mode. You can switch between these two modes manually by quickly pressing the power button (holding down will switch it off).
The camera is very light and feels well made. The materials are of reasonable high quality, the frame is metal which helps to radiate heat (this metal can get hot during use). It could probably survive the lightest of falls and bumps. As with any 360 camera, the lenses are vulnerable. The lenses are smaller than on most 360 cameras so hopefully there will be slightly less of chance of them getting scratched. I always keep it on the tripod/monopod or in the bag just to be sure. I found a great monopod here.
It is rated IP67 for water resistance, Not Waterproof, this is splash, dust proof & brief submersion. Xiaomi states it can handle a maximum of 1 meter depth for no more than 30 minutes. No doubt this was in a lab in a tank of still fresh water and not in a fast flowing river or the sea. I’d certainly be careful, as of yet I haven’t risked it. Though I have read of others having successfully snorkeling with it in the shallows.
- Tip: You can reset the WiFi password by holding down the WiFi button for 5 seconds until you hear a beep. The password will be set to the default 12345678 again.
Still 360 photography is where the Mi Sphere is king. It can shoot 23 megapixel photos at a total resolution of 6921 x 3456 in either jpg or raw formats. In fact the Mi Sphere can shoot larger 360 photos than other more expensive cameras like the GoPro fusion that are twice as expensive.
The Mi Sphere really is excellent for 360 photography and in various lighting conditions, the Mi Sphere performs excellent in nearly all of them. The camera captures details excellently and deals with direct sunlight well. The dynamic range of colours in particular look great and are true to reality.
Just be aware that the preview on the phone is only low quality, once downloaded they will be full 7k. When I look at the downloaded photos taken with the Mi Sphere I see sharpness and quality which I felt was lacking with the other 360 cameras I own.
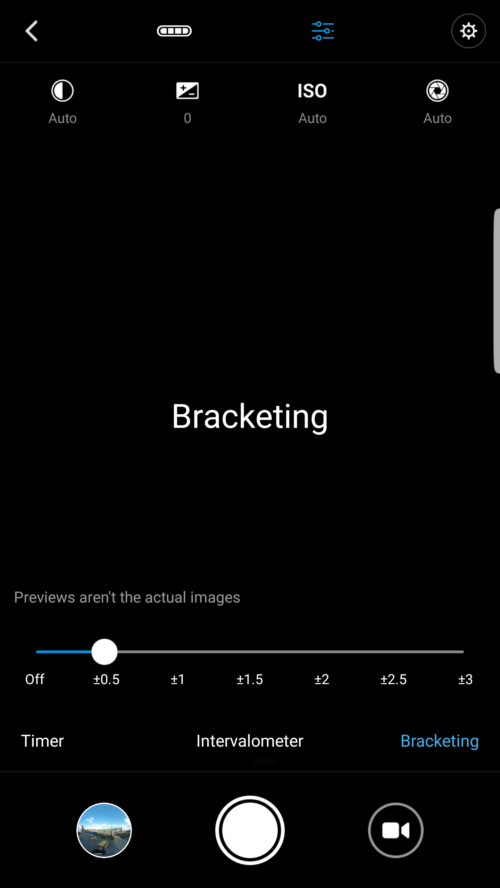
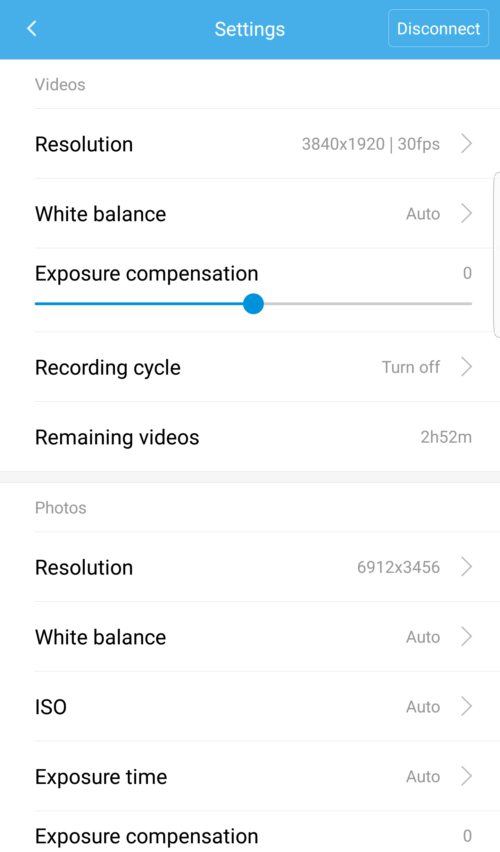
You have full control options so you can change the exposure, ISO, shutter speed, white balance and you can bracket shoot to, see the specifications below.
The resolutions available are:
- 6921 x 3456
- 3456 x 1728 (Stitched)
6921 x 3456 (Stitched)Removed in the May update as results were poor, may return in future.- 6921 x 3456 Raw
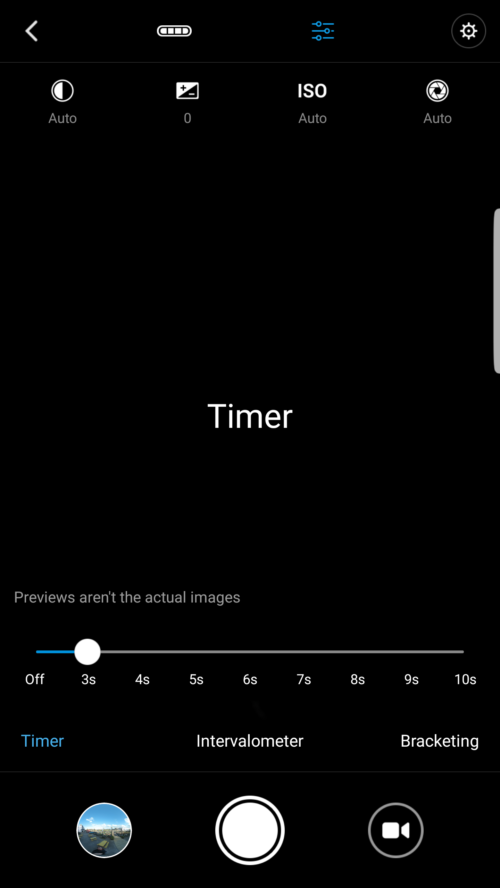
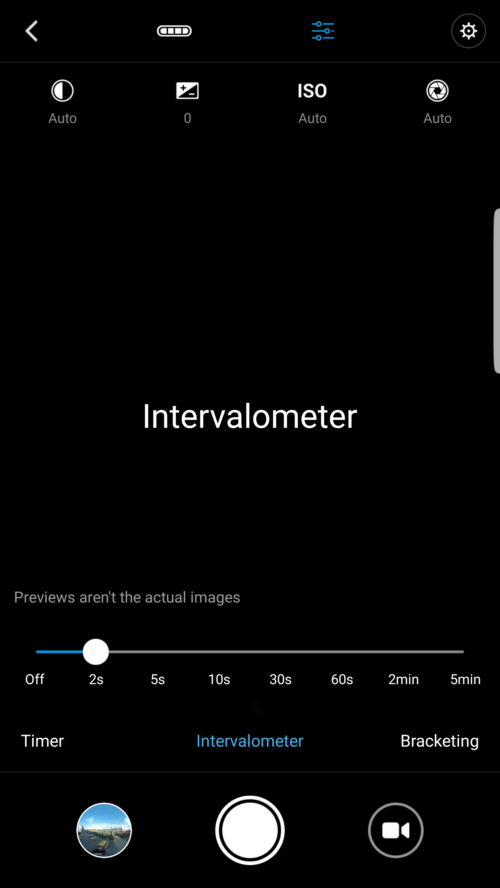
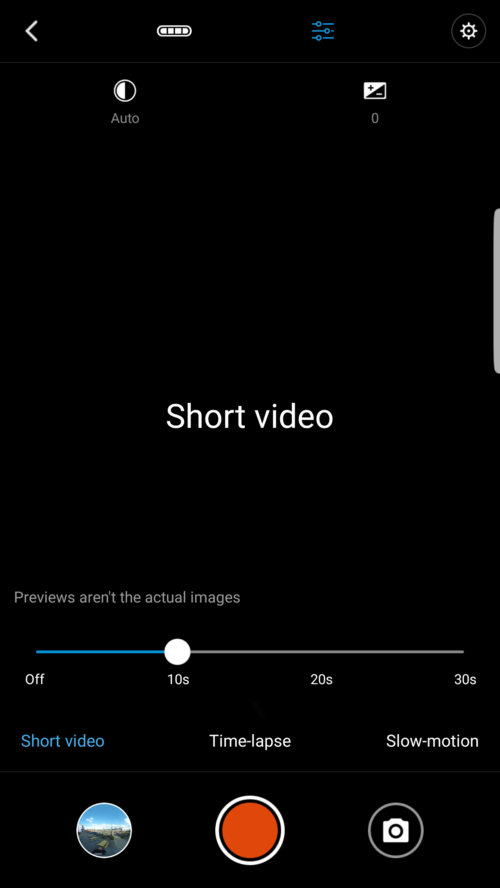
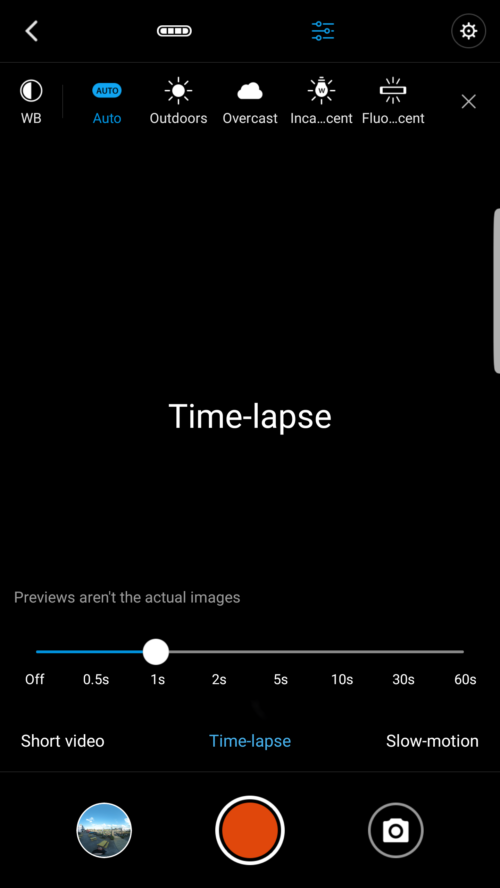
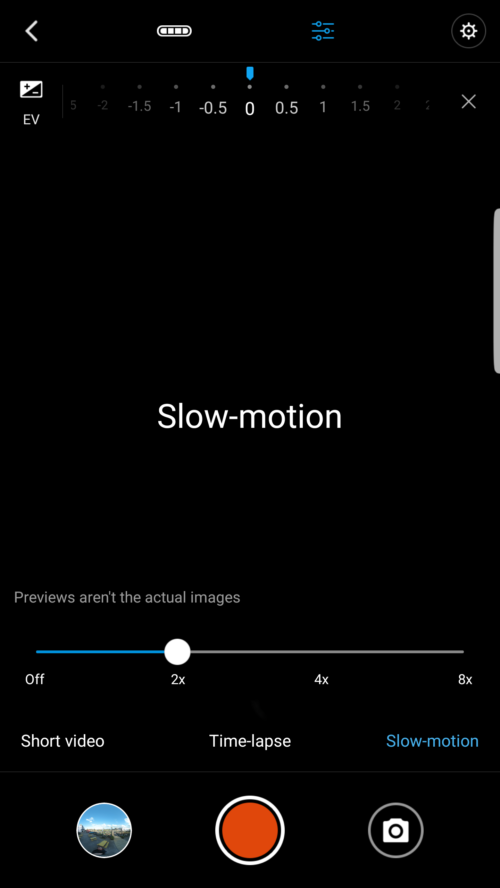
There are three options you can use on the app and then the exposure setting in the menu at the top.
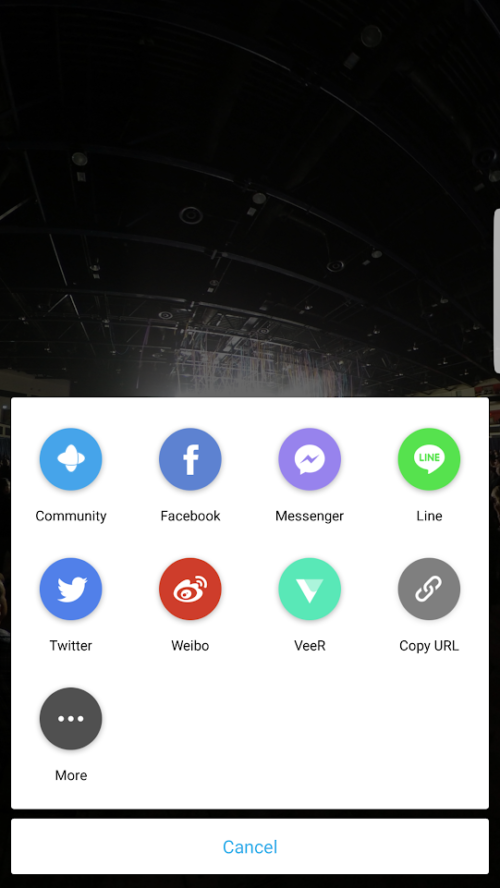
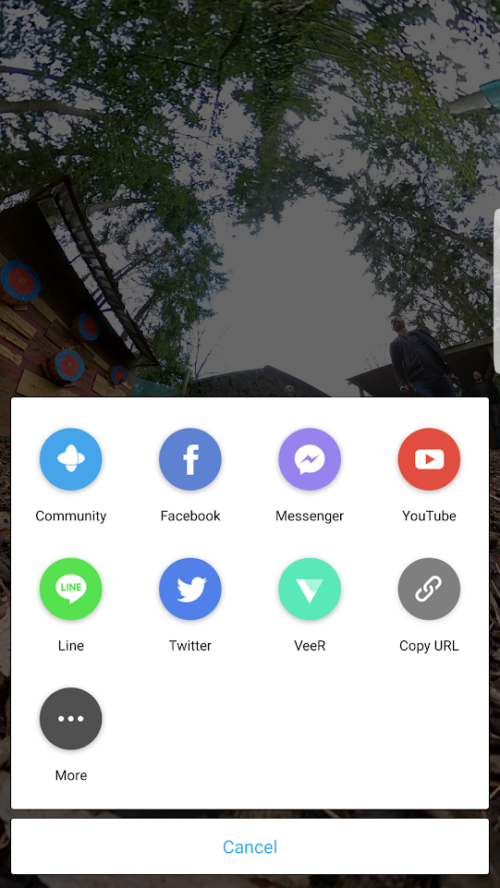
There are a few places built into the app where you can directly share to. I hope this list will grow, I’d like to see atleast instagram and whatsapp added:
Update:You can now share to virtually any app on your phone.
- Make sure you calibrate the camera before shooting, this way your images should always be level no matter the angle you shoot. Find out how here.
- Wait 5 secs after power on before shooting to make sure the gyro has corrected itself, otherwise you may find your video offset.
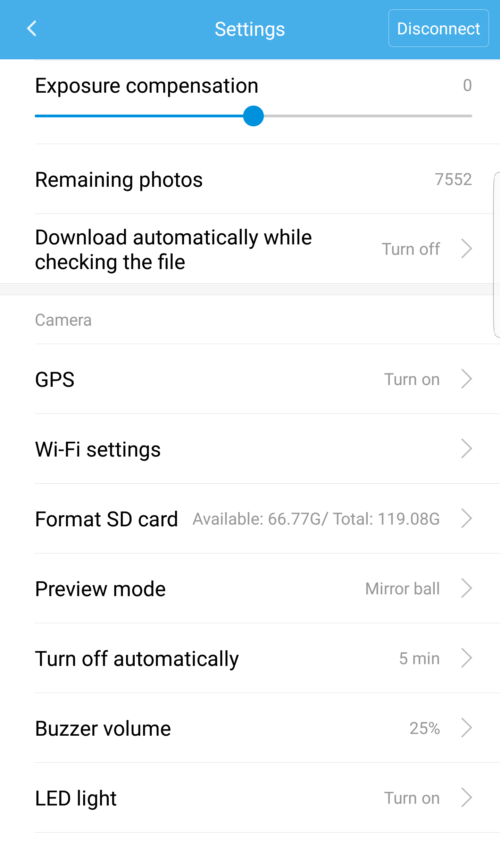
- Does GPS work without connecting to the phone? No, it gets the info from your phone. No phone, no gps.
- You’ll get the best results shooting in Raw, but only if you have time to wait and use a desktop. The only thing shooting in Raw is it does take 3 seconds after the initial beeps for the camera to finish taking the shot. If your going to be in a situation where you want to be quick, for a group shot for instance, then i suggest reverting back to full res jpg as this is almost instantly captured when you press the shutter. You can see my mobile comparison workflow here.
- When you do shoot in Raw it will also save a jpg version which you can view in the app. To get the Raw DNG file you have to download it from the sd card, not through the app. Thankfully this is now easy to do over WiFi to your phone, explained here.
- So far i have found the in-camera stitching to not really be all that good and again this does take a couple seconds to capture the shot after the shutter is pressed as it then has to stitch. This could improve with future firmware updates, but for now anyway Im choosing to stick to using MiSphere Converter as you can achieve optical flow stitching. You can find out more about using the 3rd party app called MiSphere Converter here.
- Using the self timer without the app is possible, all you do is turn the camera on, put it in photo mode then press and hold the shutter button until you hear the beep. After this you have 3 seconds to move into position as default or you can change it to however long you want using the app, I always take a shot to confirm its changed. You can then disconnect from your phone, the camera will remember the last app setting.
- You can use the volume buttons on your phone as the shutter.
-
If you need to realign the horizon or remove yourself/tripod you can using edit360 here.
- You can download a full res unstitched file to play with here.
- You can create tiny planets with the app and take a screenshot. Finding the file can be a challenge though as not all phone galleries with show your screenshot. You can find it by using your file explorer or my files and search ”madv”. You should then see a MadV360ScreenShot folder, your files will be in here. I turned on the save in SD Card if you haven’t then it will be on your internal storage. Full path is: SDCard > Android > data > com.madv360.madv.sig > DCIM>MadV360ScreenShot.

Update: 18th Jan 2018
- Xiaomi release firmware that adds 4K 3840×1920.
The Mi Sphere can shoot 3.5K 360 video. Most including me would expect the minimum for excellent quality 360 video would be 4K, however the Mi Sphere has proven this not to be the case at all. Using the cameras in several locations and lighting conditions I have found that it performs exceptionally well and the built in 6 axis stabilisation is impressive. This is only set to improve with the migration/merger to the MadV brand and the new app up-scaling to 4k.
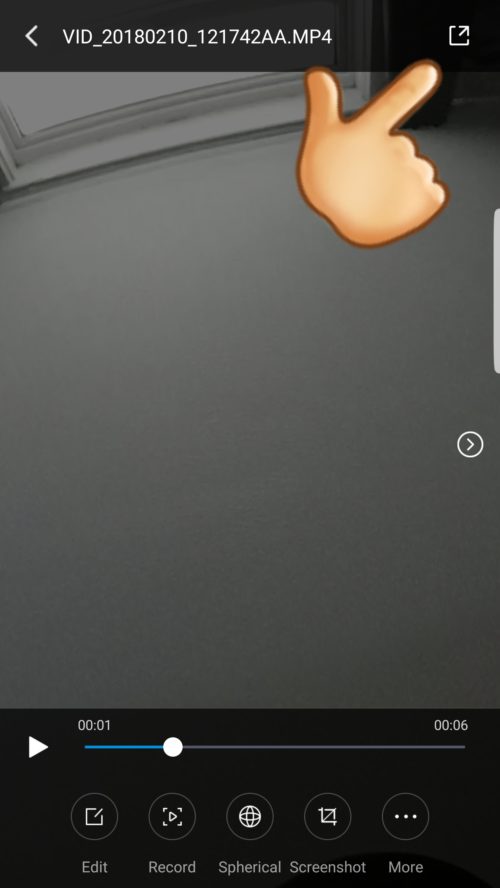
Screen recording feature (overcapture effect). When viewing videos, there is an option called “Record” which lets you record the screen while playing back the video in either tiny planet view or spherical view. The result is a static 16:9 video that you can save as a separate file, but I’ve found this to be disappointing. You have to use your finger to move the screen round instead of it using the phones gyro as you turn and it seems to re record the sound using your phone’s microphone. Hopefully they’ll work on improving this.
The resolutions available are:
- 3840×1920 | 30fps
- 3456×1728 | 30fps
- 2304×1152 | 30fps
- 2304×1152 | 60fps
- 2048×512 | 120fps Top
- 2048×512 | 120fps Bottom (Bullet Time)
- 3840×1920 | 30fps High bitrate
- 3456×1728 | 30fps High bitrate
There are three options you can use on the app and then the exposure setting in the menu at the top.
I can clearly see a difference in colour between the two lenses, especially looking up at the ceiling. I think the light flooding through the windows was the real cause, it couldn’t handle the difference. I should of turned the camera 90º, but at the time i was thinking about the stitch being down the middle of the closer balls on the table. To be fair when i showed the video to others they didn’t even notice until I pointed it out.
To download the stitched video to your phone isn’t exactly straightforward, as is using the desktop software to stitch. I’ve explained how to do both in greater detail here.
Looking for stitching with a Mac? Find out how here.
There are a few places built into the app where you can directly share to. I hope this list will grow, I’d like to see atleast instagram and whatsapp added:
Update: You can now share to virtually any app on your phone.
- Make sure you calibrate the camera before shooting, this way your images should always be level no matter the angle you shoot. Find out how here.
- Wait 5 secs after power on before shooting video to make sure the gyro has corrected itself, otherwise you may find your video offset.
- When you connect the camera to a computer you have two video files AA and AB. You’ll want to use the AA file as the AB file is just a smaller down-scaled version so it can play previews in the app.
- Using Time lapse without the app is possible, all you do is turn the camera on, put it in video mode then press and hold the shutter button until you hear the beep. After this the camera starts to record a time lapse at the last saved settings.
- Shooting using the high bitrate should reduce compression artifacts, resulting in better skies, shadows etc, but you have to connect to a computer to get to the file like Raw photos.
- There are two ways to download a file to your phone, while watching select download or while scrolling through the camera gallery press, hold and select download. Note: if you open the video to watch before downloading you can choose “More” to turn on/off the gyro calibration. More details can be found here.
- Shooting in bullet time (the matrix effect) you have to change the video resolution to > 2048×512 | 120fps Bottom (Bullet Time) Then when you hit record, just swing the camera above your head keeping a steady pace at full arms reach. Find out more details here.
-
You can create an image from a video. In the app just watch your video back in Pano mode and take a screenshot, then find the file using file manager searching for madv360screenshot. Now share it to edit360, hit save and it’ll reinject metadata. Now you’ll have a new 360 image in the edit360 folder. If you don’t have edit360. You may wish to move the file to an easier album to access it in your gallery. Then use a program like Exif fixer to inject the metadata.
Xiaomi says that the Mi Sphere will last for about an hour of continuous shooting I’ve found that connecting to the app is a severe drain on battery, so I suggest connecting only to adjust settings, then disconnecting and using it manually to extend battery life.
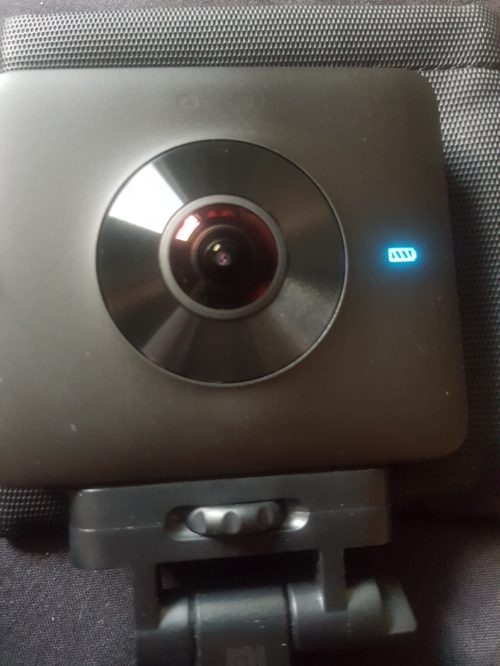
Charging from flat to fully charged, it took an hour and 5 mins. This was plugged into the mains ac with a QC 2.0 or above wall charger, I used my Samsung phone fast charge adapter. Charging it via a computer usb will undoubtedly take several hours. When the camera is fully charged the LED turns blue.
Update: I recently upgraded my phone to the Galaxy S10+, strangely using the new plug with the old usb lead wont charge the camera, it lights up for a couple seconds then goes out. I had to revert to my older Galaxy S7 fast charger to charge the camera.
Can the camera be connected to a USB power source while recording? Yes.
Tip: If your battery starts to fail you can now replace it yourself, Find out more here.
Desktop
Update: Do not use the latest version 1.20 as it’s only producing black video. Roll back to version 1.18, that works. Download it here.
This is still very new only recently being released, so it’s still pretty basic. All you can do is batch stitch photos and videos at full resolution, with or without gyro stabilization, as long as you have a Windows PC, you can download it here.
- Tip: Don’t change the output folder location, leave as default. I’ve found it fails more often than not when I try to change it.
There are now two Mac tools, but both are very basic find out more here.
App
Update: Now the MadV app can connect to the original Xiaomi Mi Sphere camera.
The Mi Sphere & MaDV 360 apps are compatible with both iOS and Android. However the MadV wont connect to the original camera as it looks for QXQX wifi while the original camera uses MJXJ. Connecting to your camera via WiFi, In order to connect to the camera you need to press the WiFi button on the camera before trying to connect. I’ve found this to be the most annoyingly tedious thing about the camera so far, because you have to do it every time you turn it on. I wish the WiFi would just auto connect automatically like either my Theta S or Gear360. Perhaps Im being picky.
On connecting to the app, your phone will probably send you a warning saying your not connected to the internet. Just dismiss it, it’s your phone telling you internet isn’t available on the cameras wifi. The app allows you to preview the image, adjust the settings and tweak manual controls. The preview image is low quality to maintain a fluid connection, the final saved output will look a lot better. Overall the App has been stable and easy to use, I’ve experienced no crashes or instability. Don’t get me wrong there is some work to be done to make the whole process easier, but Xiaomi are communicative and indicate that the app will be receiving regular updates.
- If you try to connect at home, you may find your home wifi is stronger than the cameras wifi. You may need to turn off auto reconnect to your home wifi, as it will interrupt the connection.
I do love the fact the app allows you so many controls. Exposure, shutter speed, ISO and white balance are all directly adjustable, allowing you to change the camera settings to match different conditions. These options aren’t available on many 360 cameras.
- Will the camera be able to livestream? No, unfortunately hardware limitations will prevent this from ever working.
- It is possible to install previous firmware versions and some Beta versions thanks to Michael Mendes creating this Xiaomi page with full app and desktop firmware history here.
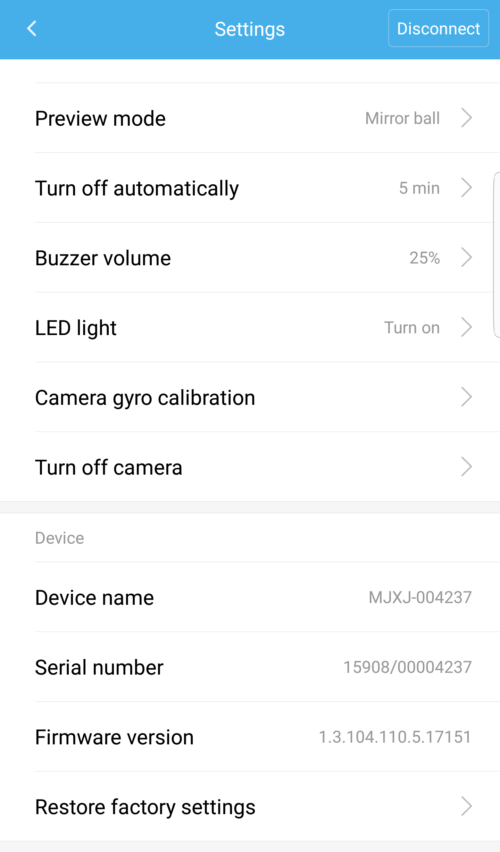
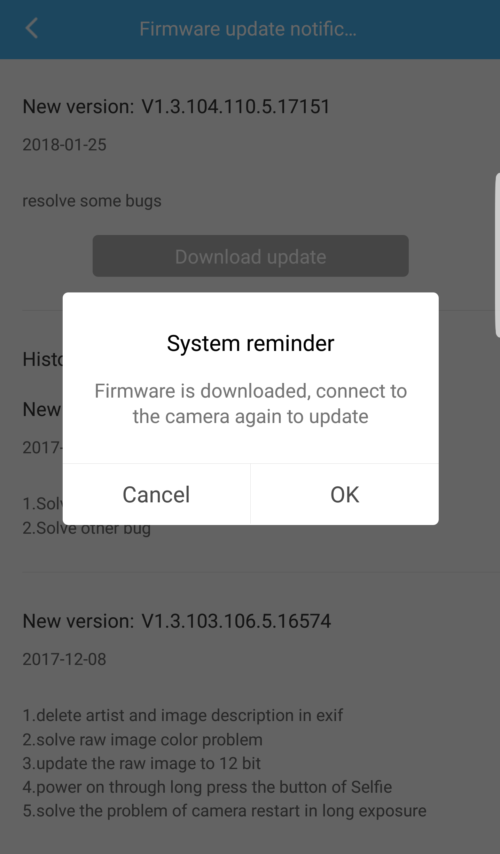
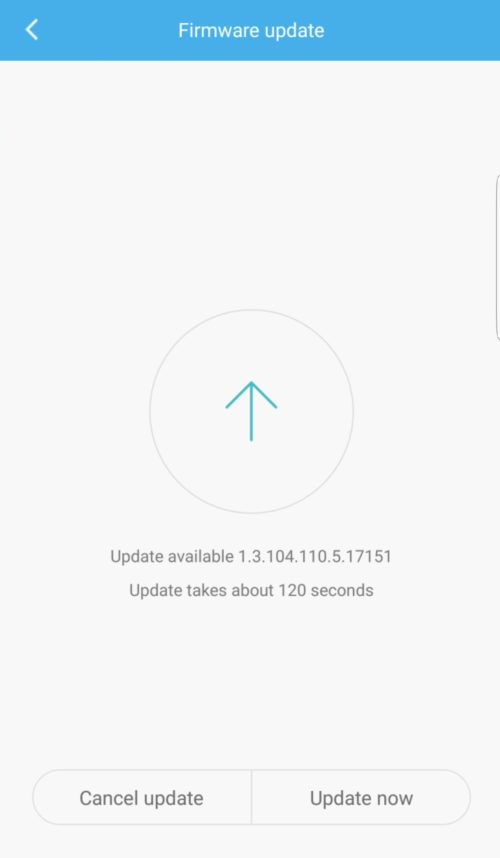
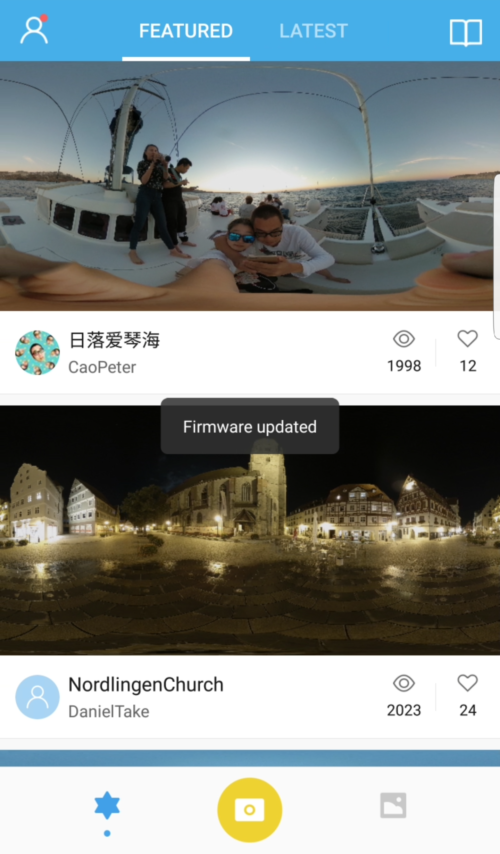
This is very simple. When I open the app if an update is available it tells me with a pop up window and asks you to download. Then the next time you connect the camera you’ll see an update camera now yes or no option. Simply click on update and it’ll give you a progress chart. The camera may turn itself off and on, but let it carry on until it tells you the firmware update is complete.
- You can install previous firmware versions and sometime Beta versions thanks to Michael Mendes and his page here.
- I just went to do the new firmware update and for the first time it wouldn’t work via my phone. Before I tried the sd card way I thought I’d try to find out why. Turns out the old update file was still in amongst my downloads stored on the phone. As soon as I deleted the old files, the update worked. Clear your old downloads and it might solve having to do it via sd card.
How to update via SD card
IMPORTANT: Make sure you have enough battery power before upgrading. Do not interrupt the upgrade after it starts as you could brick your device!
- Insert the SD card into the card reader of your computer.
- Download the firmware to your computer and rename the downloaded .zip file to “MadvSysFW.zip“.
CAUTION: If your system is set to hide file extensions by default, you should end with a file named MadvSysFW. - Open your SD card and you should see an “update” folder. This folder should be empty, if not delete any files that are in there. If it is the first camera update, you may need to create the “update” folder.
- Now copy the firmware upgrade “MadvSysFW.zip” to the “update” folder.
- When copied insert the SD card into the camera.
- With camera turned OFF, keep pressing the WIFI button and short click the Power button.
- When the Photo and Video LEDs start flashing you can release the WIFI button.
- Now wait for the firmware update to complete. Once the firmware update has completed you should hear the buzzer, then the camera will restart itself.
- After the restart the update should be complete.
Selfie Stick
There is a dedicated selfie stick made for the Xiaomi that is invisible to the Xiaomi and can control it without needing batteries or a wireless connection.
- You can change the self timer for both the camera & the selfie stick to however long you want using the app. In the app choose your desired length. For the stick I choose off, then fire a shot to set it. It should now take an instant shot. Then for the cameras shutter button again using the app I choose 5 seconds and then long press the cameras shutter. This then gives me a 5 second delay for pressing the cameras shutter button and instant shot on the selfie stick. You can then disconnect from your phone, the camera will remember the last app setting.
You can find my in depth review here. You can buy the selfie stick here.
Wireless Remote
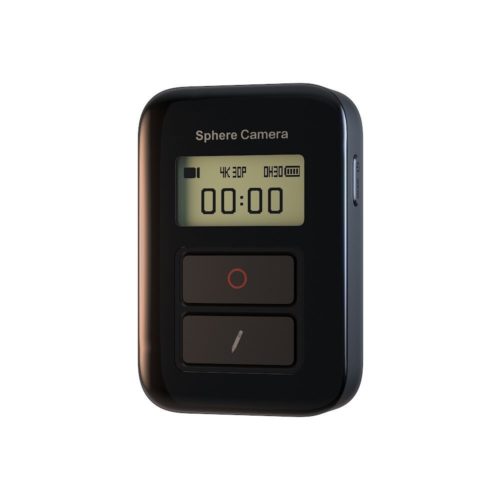
Finally the dedicated remote for the Xiaomi Mi Sphere users have been waiting for has arrived in Europe. It’s more expensive than I would’ve thought though.
- The remote is water-resistant (IP65) to the same degree as the Xiaomi Mi Sphere or Madventure 360 itself, but please note this does not mean that it is usable underwater.
- You can turn off the camera and even turn it back on,
- switch through the camera modes,
- start/stop taking pictures and videos and adjust some of the camera’s settings.
- It takes a CR2032 battery which isn’t rechargeable, so would be a good idea to carry a spare with you just incase.
You can buy the remote on amazon for £39.99 here.
Find more Xiaomi Accessories here
I thought I'd include this as I've been receiving questions about what is the difference? Well the Madventure 360 is simply just a rebranded version of the Xiaomi, repackaged with an easier name for Western markets. In addition to the distinctive orange colour, the Madventure ships with the dedicated selfie stick, a GoPro-style adaptor plus the usual accessories that come with the Mi Sphere. The Madventure app released in December 2017 added several new features such as bullet time, raw mode, bracketing, 4k video and other features. All of these features have now been added to the Xiaomi Mijia Mi Sphere app to. If you choose to buy this then the extra money your spending is essentially just for the extra accessories, so always check the prices of both before purchasing. I've seen a price difference of £100 and the accessories aren't worth that much.
Thanks to Michael Mendes we can see inside the camera
I’m very impressed with the Mi Sphere as a inexpensive consumer 360 camera. This camera can produce excellent 360 video despite the limited resolution, and its 360 photos are among the best I’ve seen of any 360 camera under $1000. I’m certain that this is one of the best value 360 cameras available right now.
There is no Livestream feature and won't be due to hardware limitations. You do need a fast Micro SD card for it to be compatible with this camera. Anything under U3 class 10, 80mb/sec is probably not going to work, but I would suggest that for any 360 camera.
If you are looking for something a bit better than the basic 360 camera out there, but without a huge price tag then the Mi Sphere is the camera for you.
I purchased the camera using Gearbest and it took 22 days to arrive and the selfie stick only took a week, but i think the camera came from Hong Kong and the selfie stick from a European warehouse.
- If your battery starts to fail you can now replace it yourself, Find out more here.
- I recently upgraded my phone to the Galaxy S10+, strangely using the new plug with the old usb lead wont charge the camera, it lights up for a couple seconds then goes out. I had to revert to my older Galaxy S7 fast charger to charge the camera.
- On connecting to the app, your phone will probably send you a warning saying your not connected to the internet. Just dismiss it, it's your phone telling you internet isn't available on the cameras wifi.
- If you try to connect at home, you may find your home wifi is stronger than the cameras wifi. You may need to turn off auto reconnect to your home wifi, as it will interrupt the connection.
- You can reset the WiFi password by holding down the WiFi button for 5 seconds until you hear a beep. The password will be set to the default 12345678 again.
- You can switch between photo & video modes manually by a 1 second press of the power button (holding it down for more will switch it off).
- Using the self Timer without the app is possible, all you do is turn the camera on, put it in photo mode then press and hold the shutter button until you hear the beep. After this you have 3 seconds by default to move into position.
- You can change the cameras self timer to however long you want using the app, I always take a shot to confirm its changed. You can then disconnect from your phone, the camera will remember the last app setting.
- You can even change the self timer for both the camera & the selfie stick to however long you want using the app. In the app choose your desired length. For the stick I choose off, then fire a shot to set it. It should now take an instant shot. Then for the cameras shutter button again using the app I choose 5 seconds and then long press the cameras shutter. This then gives me a 5 second delay for pressing the cameras shutter button and instant shot on the selfie stick. You can then disconnect from your phone, the camera will remember the last app setting.
- Does GPS work without connecting to the phone? No, it gets the info from your phone. No phone, no gps.
- Can the camera be connected to a USB power source while recording? Yes.
- Will the camera be able to livestream? No, unfortunately hardware limitations will prevent this from ever working.
- You can create tiny planets with the app and take a screenshot. Finding the file can be a challenge though as not all phone galleries with show your screenshot. You can find it by using your file explorer or my files and search ''madv". You should then see a MadV360ScreenShot folder, your files will be in here. I turned on the save in SC Card if you haven't then it will be on your internal storage. Full path is: SDCard > Android > data > com.madv360.madv.sig > DCIM>MadV360ScreenShot.
- Using Time lapse without the app is possible, all you do is turn the camera on, put it in video mode then press and hold the shutter button until you here the beep. After this the camera starts to record a time lapse at the last saved settings.
- You can use the volume buttons on your phone as the shutter
- If shooting in Raw it does take 3 seconds after the initial beeps for the camera to finish taking the shot.
- When you do shoot in Raw it will also save a jpg version which you can view in the app. To get the Raw DNG file you have to download it from the sd card, explained here
- When you connect the camera to a computer you have two video files AA and AB. You'll want to use the AA file as the AB file is just a smaller down-scaled version so it can play previews in the app.
- Shooting using the high bitrate should reduce compression artifacts, resulting in better skies, shadows etc, but you have to connect to a computer to get to the file like Raw photos.
- There are two ways to download a video file to your phone, while watching select download or while scrolling through the camera gallery press, hold and select download. Note: if you open the video to watch before downloading you can choose "More" to turn on/off the gyro calibration. Find out more details here.
- You can create an image from a video. In the app just watch your video back in Pano mode and take a screenshot, then find the file using file manager searching for madv360screenshot. Now share it to edit360, hit save and it'll reinject metadata. Now you'll have a new 360 image in the edit360 folder. If you don't have edit360. You may wish to move the file to an easier album to access it in your gallery. Then use a program like Exif fixer to inject the metadata.
- Shooting in bullet time (the matrix effect) you have to change the video resolution to > 2048×512 | 120fps Bottom (Bullet Time) Then when you hit record, just swing the camera above your head keeping a steady pace at full arms reach. Find out more details here.
- Make sure you calibrate the camera before shooting, this way your images or video should always be level no matter the angle you shoot. Find out how here.
- Wait 5 secs after power on before shooting to make sure the gyro has corrected itself, otherwise you may find your video or images offset.
- IP67 water resistance is maximum depth of 1 meter for no more than 30 minutes. No doubt this was fresh water and not in the sea
- Emergency procedure, factory reset. When the camera is off, press down and hold the WiFi button, then immediately press and hold the power button until the two LED lights are flashing.
- You can download a full res unstitched file to play with here.
- You can install previous firmware versions and sometime Beta versions thanks to Michael Mendes and his page here.
- Selfie Stick in depth review here.
If you found this helpful, please like and follow my social pages
Do you have a Xiaomi Mi Sphere? Would you recommend it?
Originally Published on: 13 Jan 2018 @ 14:50






Is it possible to use just 1 camera? Or all photos taken are in 360?
All are taken in 360, but you simply just reframe the shot to where you want. You can easily take a full resolution screenshot or direct video using the misphere app. There’s no need to only shoot with one lens at 180º, you risk missing some of the action.